Best Mini Split for a Garage in 2026: Sizing, Top Picks and the Wiring Nobody Mentions
A garage is not a spare bedroom. Here is how to size a mini split heat pump for one properly, which models are worth buying in 2026, and the electrical and winter problems most guides skip.


The short answer, before anything else
For most two-car garages, a 12,000 BTU mini split heat pump is the sweet spot — and if your garage only has one spare 115V outlet circuit, that changes which model you can buy more than any efficiency number will.
Buy a heat pump mini split, not a cooling-only one. Size it bigger than a bedroom of the same size. And check your electrical panel before you check anything else.
Those three things decide whether your garage becomes a room you actually enjoy — or an expensive box that trips a breaker every time you turn on the table saw. Everything below explains exactly how to get each one right. 💡
Here’s the thing nobody tells you when you start shopping.
A garage is not a spare bedroom. It has a giant uninsulated metal door. It usually has a bare concrete floor that soaks up cold like a sponge. The walls often have no insulation at all. And the ceiling may open straight into an unconditioned attic.
So when a sizing chart tells you “400 square feet needs 9,000 BTU,” that chart is talking about a finished room inside your house. Use it on your garage and you will buy a unit that runs flat out all day and never quite gets there.
This guide fixes that. You will learn how to size a mini split for a real garage, which specific models are worth your money in 2026, how to tell if your electrical panel can handle it, and the winter problems that most guides skip entirely — like what happens when your condensate line freezes solid in January.
By the end, you will know exactly what to buy and why. Let’s go. ✅
What’s in this guide
- Why a garage is not just another room
- What size mini split do you actually need?
- The electrical question (read this before you buy)
- Heat pump vs cooling-only: don’t get this wrong
- Our top picks for 2026
- Side-by-side comparison
- DIY or hire a pro?
- How the install actually goes, step by step
- The winter problems nobody warns you about
- 7 common mistakes (and how to fix them)
- Pro tips from people who’ve done it
- What real owners say
- What it all costs in 2026
- Frequently asked questions
- Your final checklist
Alt text: “Ductless mini split heat pump mounted on a garage wall above a workbench”
1. Why a garage is not just another room
Let’s start with why your garage is such a tough space to heat and cool. Once you understand this, the sizing math makes sense instead of feeling random.
The garage door is a giant hole in your insulation
A standard uninsulated steel garage door has an R-value of about R-0 to R-2. For comparison, a decent insulated wall is around R-13 to R-21. So that door — which might be 16 feet wide and 7 feet tall — is basically a thin sheet of metal between you and the weather.
Put numbers on it. A standard 16 ft × 7 ft door is about 112 square feet. At roughly R-2, that one surface can easily be responsible for a quarter or more of your total heat loss — despite being a small fraction of the total surface area of the room.
That’s why an insulated garage door upgrade (usually $200–$800 for an insulation kit, more for a new door) often pays for itself faster than buying a bigger mini split. It doesn’t just lower your bill — it can change which unit you need to buy.
Concrete floors pull heat out of the room
Your garage slab sits directly on the ground. In winter, the earth under it might be 45–55°F. That slab acts like a giant heat sink, quietly pulling warmth out of the air all day long. Most sizing calculators completely ignore this.
The ceiling is often taller than you think
Standard rooms have 8-foot ceilings. Plenty of garages have 9, 10, or even 12-foot ceilings — and some open all the way to the roof deck. You are heating volume, not floor area. A 400 sq ft garage with 12-foot ceilings holds 50% more air than the same garage with 8-foot ceilings.
You open a huge door to the outside on purpose
Every time that door goes up, you dump the entire air volume of the room. In a house, that never happens. In a garage, it might happen six times a day.
All four factors push in the same direction: a garage needs more capacity per square foot than living space. But there is a limit. Buy something far too big and it will short-cycle — switching on and off constantly, never running long enough to pull humidity out of the air. That is why we recommend a range, not one magic number.
Then there’s the stuff a garage does that a bedroom doesn’t
- Cars bring in water. A snow-covered car melting on your slab dumps gallons of moisture into the air.
- Workshops make dust. Sawdust and metal filings clog a mini split’s filters far faster than household dust.
- Power tools draw serious current. Your compressor, table saw, and welder are competing with your heat pump for the same circuit.
- Temperatures swing wildly. Sun on a west-facing garage door can push the space above 100°F on a summer afternoon.
Keep all of that in mind as we size your unit. Speaking of which…
2. What size mini split do you actually need?
This is the question everyone asks first, so let’s answer it properly.
The rule of thumb for living space is about 20 BTU per square foot. For a garage, you need more. How much more depends entirely on how well sealed and insulated the space is.
Start with your garage’s insulation level
| Your garage | BTU per sq ft | What that looks like |
|---|---|---|
| Fully finished & insulated | 22–25 | Insulated walls, insulated door, drywall, conditioned space above |
| Partly insulated | 26–32 | Insulated walls but a bare metal door, or good door but open ceiling |
| Bare / uninsulated | 33–40 | Studs showing, uninsulated door, open to the roof deck |
Then multiply by your floor area. A 440 sq ft two-car garage that’s partly insulated: 440 × 29 ≈ 12,760 BTU. So you’d buy a 12,000 BTU unit and insulate the door, or step up to 18,000 BTU if you can’t.
Garage size cheat sheet
| Garage type | Typical size | Insulated | Uninsulated | Volts you’ll likely need |
|---|---|---|---|---|
| 1-car | 200–288 sq ft | 9,000 BTU | 12,000 BTU | 115V |
| 2-car (most common) | 400–500 sq ft | 12,000 BTU | 18,000 BTU | 115V or 230V |
| 2.5-car / with workshop | 500–650 sq ft | 18,000 BTU | 24,000 BTU | 230V |
| 3-car | 600–800 sq ft | 24,000 BTU | 30,000–36,000 BTU | 230V |
Now adjust for your specific situation
Take your number from above and adjust:
- Ceilings over 9 feet? Add 10% for every extra 2 feet of height.
- Cold climate (regularly below 20°F)? Add 15–20%. Heat pumps lose capacity as it gets colder.
- Very hot climate with a sun-facing door? Add 10%.
- Using it as a gym or workshop? Subtract nothing — but know that people and machines add heat, which helps in winter and hurts in summer.
- Only heating/cooling it while you’re in there? Add 10–15%, because you’re asking the unit to change the temperature quickly rather than hold it steady.
People buy for the worst day of the year. Don’t. If you size for the single coldest night in a decade, your unit will be oversized for the other 364 days — short-cycling, leaving the air clammy, and wearing out its compressor early. Size for typical conditions and accept that the very worst days will need a little patience or a small space heater.
Almost every garage guide tells you to oversize by 30–50%. That rule comes from the old fixed-speed era, when a unit was either on or off, and it hasn’t been updated for modern equipment.
Today’s mini splits are inverter-driven. They modulate — very roughly between about 30% and 120% of their rated capacity. That’s brilliant for efficiency, but it means there’s a floor below which the compressor can’t throttle any further.
Put a 24,000 BTU unit in a garage that only needs 9,000 BTU on a mild day and you fall under that floor. The unit cycles on and off instead of modulating, and you get the clammy air you were trying to avoid. Size up for a genuinely leaky garage — but one step, not two.
Want a more precise number for the whole house rather than just the garage? Our heat pump sizing guide walks through proper load calculations.
3. The electrical question (read this before you buy)
This is the section most guides skip, and it’s the one most likely to derail your project. So let’s be really clear.
115V vs 230V — what’s the difference?
Mini splits come in two flavours:
- 115V (also written 110V or 120V) — plugs into the same voltage as a normal wall outlet. Almost always 9,000 or 12,000 BTU units.
- 230V (also written 220V or 240V) — needs a dedicated double-pole breaker, like an electric dryer. This is standard for 18,000 BTU and up.
Here’s why this matters so much: if your garage has a spare 115V circuit with capacity, a 115V mini split may be something you can wire yourself or have done cheaply. Adding a new 230V circuit usually means an electrician, and sometimes a panel upgrade.
This is the most repeated bad advice on the internet. You will read that a 12,000 BTU 115V unit “plugs into a standard outlet” or just needs “a free outlet on a 20-amp breaker.” That is not code-compliant.
Look at the nameplate on the outdoor unit for two numbers:
- MCA (Minimum Circuit Ampacity) — the smallest wire size the circuit can use. On a 12,000 BTU 115V unit this is often 15–20 amps, not the 10 amps people assume.
- MOP (Maximum Overcurrent Protection) — the biggest breaker you’re allowed to put on it, commonly 20A.
Size the wire from the MCA, not from the BTU rating. And give it a dedicated circuit — it cannot share the garage’s general-purpose receptacles.
⚡ The 2026 GFCI change almost nobody has caught up with
This one is new, it’s expensive to get wrong, and we could not find a single competing garage guide that mentions it.
Under the National Electrical Code, outdoor outlets and garage circuits need GFCI protection. For years there was an exception that let listed outdoor HVAC equipment skip it. That exception has now expired under NEC 210.8(F), so in jurisdictions on the current code your mini split circuit needs GFCI protection.
Here’s the catch: inverter mini splits leak a small amount of current to ground as a normal part of how their electronics work. That’s often enough to make a standard GFCI trip for no apparent reason. Owners then chase a “fault” that doesn’t exist.
Ask your electrician for a GFCI device rated for this duty — either an HF-marked Class A GFCI (tested for high-frequency leakage) or a Class C special-purpose device (SPGFCI). A bargain-bin GFCI breaker will drive you mad.
Code adoption varies by state and city, so confirm what your local inspector is enforcing before you buy parts.
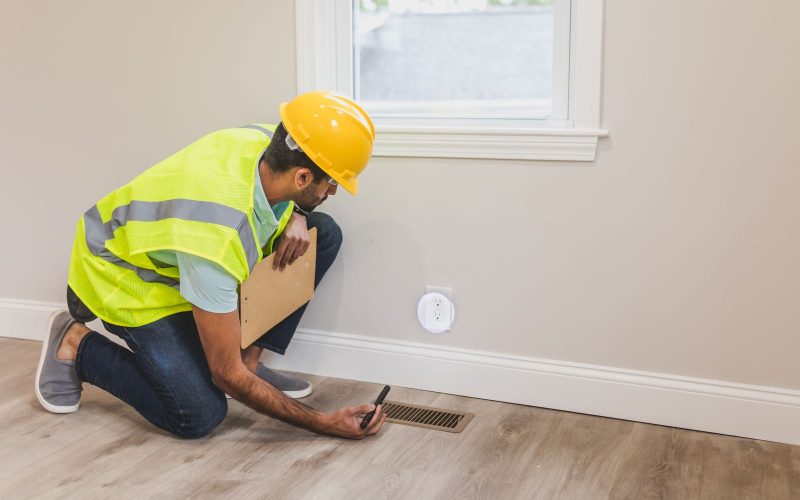
How to check your panel in 5 minutes
-
Open your electrical panel door
Look at the main breaker at the top. It will say 100, 150, or 200 amps. That’s your service size.
-
Count your empty slots
A 115V mini split needs one empty slot. A 230V unit needs two adjacent slots. No empties? You may be able to use tandem breakers, or you may need a subpanel.
-
Think about what runs at the same time
If you have a 100A panel already feeding an electric range, dryer, and water heater, adding a 230V heat pump may push you over. An electrician can do a proper load calculation for about $100–$200.
-
Check the distance to the garage
Long wire runs need thicker (more expensive) wire. A 60-foot run from panel to garage costs meaningfully more than a 15-foot run.
If your panel is full and a 230V circuit means a $2,000 upgrade, buy a 115V unit instead — even if it means insulating the garage door to make the smaller capacity work. A $400 insulation kit plus a 12,000 BTU 115V unit is far cheaper than a panel upgrade plus an 18,000 BTU 230V unit, and it performs about the same in a sealed garage.
4. Heat pump vs cooling-only: don’t get this wrong
Some mini splits only cool. Most modern ones both heat and cool. For a garage, you almost certainly want a heat pump — a unit that does both.
Why? Because the whole reason to condition a garage is usually to use it year-round. A cooling-only unit leaves you with a freezing workshop from November to March.
Reading the cold-weather specs honestly
This is where marketing gets slippery, so pay attention. You’ll see two very different numbers:
| What the spec says | What it actually means | How much you should trust it |
|---|---|---|
| “Operates down to −13°F” | The unit will switch on and run at that temperature | ⚠️ Says nothing about how much heat it makes |
| “Rated capacity at 5°F” | How many BTUs it actually delivers when it’s 5°F outside | ✅ This is the number that matters |
| “HSPF2 of 8.5” | Seasonal heating efficiency, like MPG for heating | ✅ Useful for comparing running costs |
| “22 SEER” | Cooling efficiency on the old test method | ⚠️ Not comparable to SEER2 — SEER2 numbers run lower |
A unit that “operates to −13°F” might only be producing 50% of its rated heat at that temperature. That’s still useful — but if you sized for 12,000 BTU and you’re getting 6,000, your garage will be chilly on the coldest nights.
Operating range tells you the unit will turn on. Rated capacity at a specific temperature tells you whether it will actually keep you warm. Only one of those is a promise.
— The single most useful thing to understand before you buy
If you live somewhere genuinely cold, read our guide to the best heat pumps for cold climates and our explainer on what SEER2 and HSPF2 actually mean.
Through 2025, the industry switched away from R-410A refrigerant to lower-warming alternatives like R-454B and R-32. New units you buy now will mostly use the new stuff. It doesn’t change how well they work, but it does mean older discounted stock may be harder to service in a decade. We cover this in detail in our refrigerant transition guide.
5. Our top picks for a garage in 2026
We’ve focused on units you can actually buy online and install without a commercial contract. All of these are heat pumps — they heat and cool — and all come with pre-charged line sets or straightforward kits.
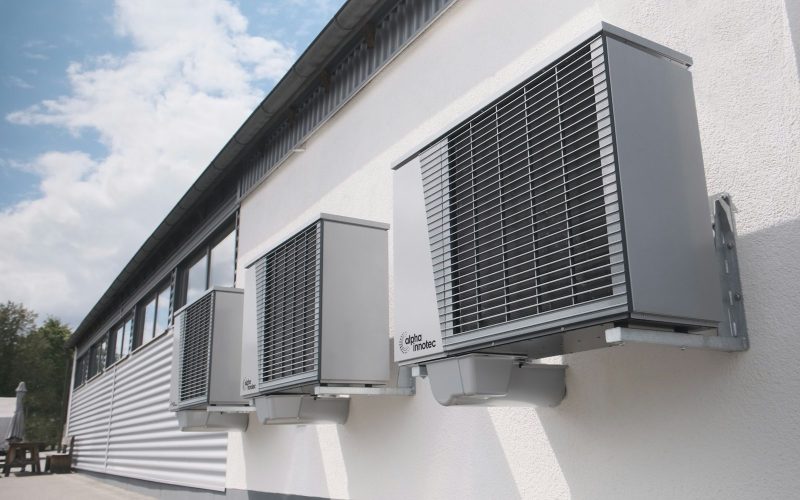
Alt text: “Mini split outdoor condenser unit mounted on the exterior wall of a garage”
🏆 Best overall for a two-car garage
MRCOOL DIY 4th Gen — 12,000 BTU Ductless Mini Split Heat Pump
This is the one we’d point most people to, and the reason is simple: it runs on 115V. That means a standard dedicated circuit instead of an electrician wiring a new 230V line. For a 400–500 sq ft garage that’s reasonably sealed, 12,000 BTU is the right amount of capacity, and the pre-charged Quick Connect line set means you don’t need a vacuum pump or refrigerant licence to install it.
✅ What we like
- 115V — no 230V circuit needed, which is the single biggest cost saver
- Pre-charged Quick Connect lines — genuinely DIY-able in an afternoon
- Low refrigerant alarm and filter-cleaning alerts built in
- Very quiet indoors at low fan speed
- Auto-restart after a power cut — useful if you heat the garage to protect stored items
⚠️ Keep in mind
- The listed “22 SEER” is the older test metric — SEER2 figures run lower
- 12,000 BTU may not be enough for a bare, uninsulated garage in a cold climate
- You still need a dedicated circuit — you can’t share with power tools
- DIY installs can affect how warranty claims are handled; register it properly
🔧 Best for a big garage or workshop
MRCOOL Easy Pro — 24,000 BTU Ductless Mini Split Heat Pump (230V)
If you have a three-car garage, a tall shop, or a bare uninsulated space, 12,000 BTU won’t cut it. This 2-ton unit has the muscle for 600–800 sq ft. It’s the Easy Pro line rather than the DIY line, which means the line set is designed for a professional flare and vacuum — budget for an HVAC tech to make the final connections.
✅ What we like
- Enough capacity for a genuinely large or poorly insulated space
- The strongest review record of the large units we looked at
- Inverter compressor ramps up and down instead of hard cycling
⚠️ Keep in mind
- Needs a 230V dedicated circuit — factor in an electrician
- Listed at 60 dB outdoors, so think about where you mount it relative to neighbours
- Not a DIY Quick Connect kit — professional connection expected
Two more worth considering
MRCOOL 5th Gen DIY — 9,000 BTU (115V)
The newest DIY generation in the smallest size. Right-sized for a 200–300 sq ft single-car garage that has some insulation, and it runs on 115V. Rated 23.6 SEER on the older metric. Note: this listing has very few reviews so far, so there’s less owner feedback to lean on than the 12,000 BTU model.
Check Price on Amazon →Pioneer Diamante Essenza — 11,500 BTU (115V)
A cheaper way into a 115V heat pump, and one of the few that publishes a proper 17 SEER2 / 9.5 EER2 figure rather than the older SEER number. Quiet at 29 dB indoors. Reviews are more mixed than the MRCOOL, and it isn’t a Quick Connect kit — plan on a pro for the refrigerant connections.
Check Price on Amazon →You’ll see some listings with a perfect 5.0 rating from only three or four reviews. That is not evidence of quality — it’s just a small sample. We’ve flagged those above rather than pretending they’re proven. When two products are close, the one with 190 reviews at 4.3 stars tells you far more than one with 4 reviews at 5.0.
6. Side-by-side comparison
| Model | BTU | Volts | Best garage size | DIY friendly? | Owner rating |
|---|---|---|---|---|---|
| MRCOOL DIY 4th Gen | 12,000 | 115V ✅ | 400–500 sq ft | Yes — Quick Connect | 4.3 ★ (190+) |
| MRCOOL 5th Gen DIY | 9,000 | 115V ✅ | 200–300 sq ft | Yes — Quick Connect | 5.0 ★ (very few) |
| Pioneer Diamante Essenza | 11,500 | 115V ✅ | 350–450 sq ft | Partly — pro connect | 3.9 ★ (12) |
| MRCOOL Easy Pro | 24,000 | 230V | 600–800 sq ft | No — pro connect | 4.7 ★ (88) |
| MRCOOL 5th Gen DIY | 24,000 | 230V | 600–800 sq ft | Yes — Quick Connect | 5.0 ★ (very few) |
Efficiency ratings vary by the exact indoor/outdoor pairing. Always confirm the specs on the listing before you buy — manufacturers update models frequently.
7. DIY or hire a pro?
Mini splits are one of the few HVAC jobs a confident homeowner can genuinely tackle — if you buy the right kit.
What makes a unit “DIY-able”
The hard part of a normal mini split install is the refrigerant. A pro has to flare the copper lines, pull a vacuum to remove air and moisture, then release the charge. That needs tools and, for some refrigerants, an EPA certification.
DIY kits solve this with pre-charged Quick Connect line sets. The refrigerant is already sealed in the line. You route the line, tighten the fittings by hand with a wrench, and open the valves. No vacuum pump, no gauges, no licence.
This is the most expensive beginner mistake we came across. People watch a generic mini split install video, see the installer evacuate the lines, and copy it — which pulls the factory charge straight out of the line set. The unit then barely works, and you need a certified tech with a scale to put refrigerant back in.
Follow the manual that came with your DIY kit, not a generic video. The whole point of paying extra for a pre-charged system is that you skip that step.
Two more things worth knowing before you commit to DIY:
- The quick-connect fittings are usually single-use. Once the seal is broken you generally cannot reconnect them, so treat your line routing as permanent. Decide where everything goes before you start.
- Warranty rules vary a lot by brand. Some manufacturers only honour warranties on installations by a licensed contractor, which effectively means no warranty on a self-install. The DIY-branded lines are the ones actually designed to be owner-installed. Read the warranty terms before you buy.
| Task | DIY-friendly? | Notes |
|---|---|---|
| Mounting the indoor unit | ✅ Yes | Find studs, level the bracket, done |
| Drilling the wall pass-through | ✅ Yes | 3-inch hole saw, slight downward slope outside |
| Setting the outdoor unit | ✅ Yes | Pad or wall bracket, level, clear of snow line |
| Connecting pre-charged lines | ✅ Yes | Only with a Quick Connect kit |
| Flaring & vacuuming lines | ❌ No | Needs tools and skills most people don’t have |
| Running a new circuit | ⚠️ Depends | Many areas require a licensed electrician and a permit |
| Pulling the permit | ⚠️ Depends | Check locally — see below |
Yes, you probably need a permit
Almost nobody mentions this, so here it is plainly: most jurisdictions require an electrical permit for a new dedicated circuit, and many require a mechanical permit for the HVAC equipment itself.
Skipping it can cause real problems later:
- Home insurance may push back on a claim tied to unpermitted work
- Unpermitted work shows up during a home sale inspection and can delay closing
- Some manufacturer warranties ask for proof of proper installation
On budget equipment it usually means parts only. If a compressor fails, you can expect to pay for diagnosis, labour and freight yourself — owners report several hundred dollars and multiple weeks without heat even on an approved claim. Register the warranty on time, keep your receipt, and budget for the possibility.
A residential electrical permit is usually $50–$250. Call your local building department and ask. It’s a ten-minute phone call.
Do the mounting, drilling, and line routing yourself. Hire an electrician for just the circuit — that’s typically $300–$700 versus $1,500–$3,000 for a full professional install. You get code-compliant wiring and a permit, and you keep the labour savings on the fiddly-but-easy parts.
8. How the install actually goes, step by step
Here’s the realistic sequence for a DIY Quick Connect install. Budget a full Saturday for your first one.
-
Plan both unit positions first
Indoor unit: high on a wall, at least 6 inches below the ceiling, where airflow isn’t blocked by a garage door track or shelving. Outdoor unit: on a solid pad or wall bracket, above your typical snow depth, and not right under a bedroom window. Keep the line-set run as short as you can — most kits give you 16 or 25 feet.
-
Mount the indoor bracket, dead level
Hit studs. Use a real level. If the indoor unit tilts the wrong way, condensate will run back into the unit and drip onto your floor instead of draining outside.
-
Drill the pass-through hole
Usually a 3-inch hole saw. Slope it slightly downward toward the outside so water drains away, not in. Check for wiring and pipes before you cut.
-
Set the outdoor unit
Level, on a pad or bracket, with clearance around it for airflow — check the manual, usually 12 inches at the back and 20+ inches at the front. In snow country, raise it 12–18 inches off the ground.
-
Route and connect the line set
Gently uncoil — don’t kink the copper, and don’t leave excess line coiled up (it traps oil); lay any spare in a gentle S-shape instead. Feed through the wall, then tighten the pre-charged fittings with a torque wrench, to the manual’s exact spec. Not “good and tight” — over-tightening a flare causes just as many leaks as under-tightening, and this joint is the single most common DIY failure point.
-
Wire it up
Communication cable between the units, then power from the dedicated circuit with a disconnect box outside. This is the step to hand to an electrician if you’re at all unsure.
-
Open the valves and start it up
Open the service valves with the supplied hex key, check for leaks with soapy water, then power on and run both heating and cooling for 20 minutes each.
-
Seal and tidy
Seal the wall penetration with the supplied putty, add a line-set cover if it’s exposed to sun, and clip the condensate line so it drains cleanly away from the foundation.
For a fuller picture of what a professional install involves, see what to expect from a heat pump installation.
9. The winter problems nobody warns you about
This is the section we most wish someone had written for us. Every guide covers sizing. Almost none cover what goes wrong in February.
Your condensate line can freeze solid
In heating mode, a heat pump makes condensate outdoors — the outdoor coil gets cold, moisture forms on it, and it has to drain away. In freezing weather, that water can freeze at the base of the unit or in the drain line.
When it does, ice builds up inside the base pan. That can damage the fan blade and wreck the coil. It’s one of the most common cold-climate heat pump failures, and it’s entirely preventable.
- Raise the outdoor unit 12–18 inches on a stand or wall bracket so meltwater drains clear
- Add a base pan heater if you’re regularly below 20°F — a cheap accessory that pays for itself the first winter
- Keep the drain path clear of leaves, gravel, and ice
- Bin the corrugated drain tubing that comes in the kit — it sags on horizontal runs, traps debris and can’t be cleaned. Use Schedule 40 PVC with a proper slope instead
- Never mount it where roof runoff or snow slides onto it
Defrost cycles look alarming and are completely normal
Every so often in cold, damp weather the unit will briefly reverse itself to melt frost off the outdoor coil. You’ll see steam, hear the fan stop, and feel the indoor air go cool for a few minutes. This is the system working correctly. People panic and call for service constantly over this.
Sawdust will clog your filters faster than you expect
If you use the garage as a workshop, your filters will need cleaning far more often than the manual suggests. Light hobby use: monthly. Serious woodworking or metalwork: owners report weekly, and sometimes daily, plus blowing the indoor unit out with compressed air. A clogged filter kills efficiency and can freeze the indoor coil.
Cars bring in a surprising amount of water
A snow-covered car melting on your slab releases a lot of moisture. Combined with a cold concrete floor, that can mean condensation on tools and surface rust. Running the mini split in dry or fan mode after parking a wet car helps a lot.
In the humid South, owners report a specific and annoying problem: cool the garage down properly, then open the overhead door on a muggy day, and every cold metal surface in the room instantly sweats — tools, machine tables, the car.
The fix is to treat the garage as a humidity problem rather than a temperature one. Many owners run a deliberately high setpoint of 78–81°F, which keeps the air dry without chilling metal below the dew point. Some add a standalone dehumidifier and let that do the heavy lifting.
Your mini split probably can’t hold the garage at 45°F
This one catches almost everyone, and we’ve not seen another garage guide mention it.
The obvious plan is to leave the garage at 40–45°F all winter — just warm enough to stop things freezing — and bump it up when you’re working out there. Sensible idea. Most mini splits won’t do it.
Thermostats on these units have a floor, and it’s higher than you’d expect:
- Many bottom out around 60°F in normal heating mode
- Some offer a minimum-heat or freeze-protect mode that holds roughly 46–50°F
- Very few will sit at 40°F on purpose
So before you buy, check the manual for the minimum heating setpoint and whether it has a freeze-protect function. If holding the space just above freezing is your actual goal, a mini split may be the wrong tool, and a simple electric or gas unit heater on a thermostat may serve you better.
Mini splits are excellent at holding a temperature and mediocre at recovering from a big setback. Leaving the garage at 40°F and expecting to walk in and have 65°F in fifteen minutes does not happen.
If you use the space regularly, pick a steady setpoint you can live with and leave it there. If you use it occasionally, turn it on from your phone an hour before you head out — which is exactly what the Wi-Fi module is genuinely useful for.
10. Seven common mistakes (and how to fix them)
❌ Mistake 1: Sizing it like a bedroom
Using a standard 20 BTU/sq ft chart on an uninsulated garage. You end up 30–40% short and the unit runs constantly without reaching temperature.
❌ Mistake 2: Sharing a circuit with power tools
Plugging the mini split into an existing garage outlet. The breaker trips whenever the compressor starts at the same time as a saw.
❌ Mistake 3: Mounting the outdoor unit on the ground in snow country
It gets buried, the base pan ices up, and airflow is blocked.
❌ Mistake 4: Buying a cooling-only unit
It’s cheaper on the listing page, and useless from November to March.
❌ Mistake 5: Skipping the garage door
Spending $1,200 on a bigger unit to overcome a $300 insulation problem.
❌ Mistake 6: Mounting the indoor unit behind the garage door track
Airflow gets blocked by the open door, or worse, the door hits the unit.
❌ Mistake 7: Believing “operates to −13°F” means “keeps you warm at −13°F”
You size for 12,000 BTU, and on the coldest night the unit is delivering half that.
11. Pro tips from people who’ve done it
- Buy the line-set cover. It’s about $30 and it stops UV from destroying the insulation on your exposed lines. Skipping it is the most common regret.
- Put a surge protector on the circuit. Inverter boards are the expensive failure point, and garages often share a panel with heavy inductive loads.
- Don’t mount the indoor head too high. This is counter-intuitive. The unit’s thermostat is a sensor in its own return air, so if you hang it at 12 feet it reads the hot air pooled at the ceiling and under-heats the space you’re standing in. Aim for around 8 feet, or as low as the manual allows.
- Prefer a ground stand to a wall bracket for the outdoor unit where you can. Brackets transmit compressor vibration into the structure — especially noticeable on an attached garage wall. If you must bracket it, fix into studs, use rubber isolators, and leave a loop in the line set.
- Tape the line-set insulation continuously, including at the flares. A gap inside an uninsulated garage wall becomes a condensation point you’ll never see until it stains something.
- Seal the wall penetration properly. Beyond drafts, an open hole is an invitation — owners have found mice nesting in, and shorting out, outdoor units.
- Add a cheap ceiling fan on low, running year-round, to push stratified warm air back down. It makes a bigger difference than another 3,000 BTU.
- Photograph everything before you close up the wall. Line routing, wiring, stud positions. Future you will be grateful.
- Register the warranty the week you install it. Many warranties are shorter — or void — if you don’t register within 30 or 60 days.
- Seal the bottom of the garage door. A $25 rubber threshold seal stops the draft that undermines everything else you’ve done.
12. What real owners say
We went looking through owner forums and long-term reports rather than repeating marketing copy. Some clear patterns emerged — and a few of them contradict what you’ll read on product pages.
The two most common regrets are almost never about the brand. They’re “I should have insulated the garage door first” and “I wish I’d run the refrigerant lines somewhere I could actually reach.”
The cold-weather number in the marketing is optimistic
One Northeast owner running a DIY multi-head system through several seasons reported it worked well overall and cost far less than the quotes he’d had for premium brands — but that it visibly struggled once outdoor temperatures dropped below about 20°F. That’s on equipment marketed with a −13°F headline.
This is exactly the operating-range-versus-capacity gap we covered earlier. Plan for it.
Warranty claims cover parts, not your time or freight
A recurring story: a compressor fails a couple of years in, the claim is honoured, and the owner is still out hundreds of dollars in shipping and several weeks without heat while it’s diagnosed by email. One owner described roughly three weeks of back-and-forth before approval, and about a month start to finish.
Parts warranties are genuinely valuable. Just don’t read “10-year warranty” as “10 years of free repairs” — labour, diagnostics and freight are usually yours.
The quick-connect fittings are the usual failure point
When DIY systems fail, it’s most often refrigerant loss at the pre-charged connections — an over-tightened flare, the wrong torque, or a valve disturbed during install. It shows up weeks or months later as an error code and no cooling.
Use a torque wrench and follow the manual’s spec exactly. Not “good and tight.” Over-tightening a flare is just as bad as under-tightening it, and it is the most common reason a DIY install fails later.
Run your lines where you can reach them
One owner buried the refrigerant lines inside a finished double wall. When a leak developed years later, reaching it meant opening the wall. He went weeks without heat and struggled to find a local technician familiar with the brand.
In a garage you usually have exposed studs or a surface-mount option. Take it. Use a line-set cover and keep the run accessible.
Dusty workshops are genuinely hard on these units
We found reports from woodworkers and metalworkers cleaning filter screens daily, and blowing out the indoor unit with compressed air monthly, still finding dust packed into the heat exchanger. In one discussion about a concrete-grinding shop, an installer had actively discouraged a mini split.
If your garage is a light-duty workshop, you’ll be fine with more frequent filter cleaning. If you generate serious dust all day, be realistic — you may be better off with radiant heat and separate dust extraction.
Expect a shorter life from budget equipment than the marketing implies
Affiliate articles routinely quote 12–20 year lifespans. Owner reports are more mixed. Premium-brand owners do report units running well at 7, 13, even 19 years. But several owners of budget units — and at least one technician quoted in those discussions — put realistic expectations closer to 5–10 years, with indoor-coil leaks showing up early on cheaper equipment.
That doesn’t make budget units a bad buy for a garage. It just means you should think of a $900 unit as a good-value appliance, not a 20-year investment.
When it’s sized and installed properly, people are happy
The positive reports are consistent too: shop owners describing quiet, cheap, year-round comfort, with monthly running costs that surprised them on the low side. The pattern is clear — the failure mode is almost always sizing or installation, not the technology.
If noise is a particular worry for you — a garage attached to a bedroom wall, or close neighbours — our guide to heat pump noise explains what the decibel numbers actually mean in practice.
13. What it all costs in 2026
Let’s put real numbers on this so you can budget properly.
| Item | Typical cost | Can you skip it? |
|---|---|---|
| Mini split unit (9K–12K, 115V) | $700–$1,600 | No |
| Mini split unit (18K–24K, 230V) | $1,200–$2,600 | No |
| Electrician — new dedicated circuit | $300–$700 | Only if you’re qualified |
| Electrical panel upgrade (if needed) | $1,500–$4,000 | Avoid by choosing 115V |
| Permit | $50–$250 | Not advisable |
| Full professional install (labour) | $1,000–$2,500 | Yes, with a DIY kit |
| Wall bracket or pad | $40–$150 | No |
| Line-set cover | $25–$60 | Don’t |
| Garage door insulation kit | $200–$800 | Often the best value item here |
| Base pan heater (cold climates) | $40–$120 | Not below 20°F |
Two realistic budgets
The lean DIY route — 12,000 BTU 115V DIY kit, you do the mounting and lines, an electrician does the circuit, plus a door insulation kit: roughly $1,500–$2,600 all in.
The full-service route — 24,000 BTU 230V unit, professional install, new circuit, permit: roughly $3,500–$6,000.
What it costs to run
A 12,000 BTU heat pump draws roughly 700–1,200 watts when it’s working hard, much less when it’s just holding temperature. At 17¢/kWh, holding a garage at 55°F through a cold-climate winter typically lands somewhere around $25–$60 a month, depending heavily on how well sealed the space is.
That’s the thing about insulation: it doesn’t just reduce what you have to buy, it reduces what you pay every month forever.
You’ll still find articles telling you to claim the 25C federal tax credit for a heat pump. That credit ended for property placed in service after 31 December 2025. Don’t build it into your budget.
What may still be available: state rebates, utility company rebates, and state tax credits. These vary enormously by location and are worth ten minutes of searching your utility’s website. Also note that garage-only installations often don’t qualify for programmes aimed at primary living space — check the fine print. More detail in our guide to what replaced the federal credit.
For whole-home budgeting rather than just the garage, try our heat pump cost calculator.
14. Frequently asked questions
What size mini split do I need for a 2-car garage?
For a typical 400–500 sq ft two-car garage, 12,000 BTU is right if the space has some insulation, and 18,000 BTU if it’s bare with an uninsulated door. Add roughly 10% for every 2 feet of ceiling height above 9 feet, and 15–20% if you regularly see temperatures below 20°F.
If you’re between sizes, insulating the garage door first will usually let you buy the smaller unit — which is often cheaper overall and may let you stay on a 115V circuit.
Can I run a mini split on a normal garage outlet?
No — and this catches a lot of people out. Even a 115V mini split needs its own dedicated circuit. Check the MCA figure on the outdoor unit’s nameplate: on a 12,000 BTU 115V unit it is often 15–20 amps, not the 10 amps people assume. Sharing that with a shop vac or compressor will trip the breaker, and it isn’t code-compliant.
The good news: adding a dedicated 115V circuit is much simpler and cheaper than adding a 230V one, which is exactly why we lean toward 115V units for garages.
Will a mini split heat my garage in freezing weather?
Yes, but read the specs carefully. Look for the rated heating capacity at 5°F or 17°F, not just the “operating range.” A unit that operates down to −13°F may only deliver half its rated BTUs at that temperature.
In genuinely cold regions, size up by 15–20%, raise the outdoor unit off the ground, and consider a base pan heater to stop ice building up.
Can I install a mini split myself?
With a DIY kit that has pre-charged Quick Connect line sets, yes — most confident DIYers manage it in a day. The refrigerant is sealed in the line, so there’s no vacuum pump or EPA certification needed.
The electrical is a different matter. Many areas require a licensed electrician and a permit for a new circuit. The most cost-effective approach for most people is doing the mechanical work yourself and paying an electrician a few hundred dollars for the circuit.
Does my mini split circuit need GFCI protection?
In jurisdictions on the current National Electrical Code, yes. The long-standing exception that let listed outdoor HVAC equipment skip GFCI protection has now expired under NEC 210.8(F).
The complication is that inverter mini splits leak a little current to ground by design, which can trip an ordinary GFCI for no real reason. Ask your electrician for an HF-marked Class A GFCI or a Class C special-purpose device. Code adoption varies locally, so confirm with your inspector before buying parts.
Can I leave my garage at 45°F all winter with a mini split?
Usually no, and this surprises a lot of people. Many mini splits have a minimum heating setpoint of around 60°F. Some offer a freeze-protect or minimum-heat mode holding roughly 46–50°F, but very few will sit at 40°F deliberately.
Check the manual for the minimum setpoint before you buy. Bear in mind too that mini splits recover slowly from a deep setback, so if you want to walk in and warm the space fast, that is not their strength. If frost protection is your only goal, a thermostatically controlled unit heater may suit you better.
Do I need to insulate my garage first?
You don’t have to, but it’s usually the best money you’ll spend. An uninsulated garage door can be responsible for a large share of your heat loss. Insulating it can cut your BTU requirement by 30–40%.
In practical terms, that can be the difference between needing an 18,000 BTU 230V system (electrician, new circuit, maybe a panel upgrade) and a 12,000 BTU 115V system. The insulation kit often costs less than the difference.
Will running a mini split in my garage save me money?
Compared to electric space heaters, yes — significantly. A heat pump moves heat rather than generating it, so it typically delivers two to three times more heat per unit of electricity than a resistance heater.
But be honest with yourself: if your garage is currently unconditioned, you’re adding a new energy cost, not removing one. The right way to think about it is value per dollar — you’re buying a usable room, cheaply, compared to any other way of getting one.
15. Your final checklist
Print this, or screenshot it. Work through it in order.
✅ Before you buy
- Measure your garage — floor area and ceiling height
- Assess insulation honestly — walls, ceiling, and especially that door
- Calculate BTUs — 22–25/sq ft finished, 26–32 partial, 33–40 bare
- Open your electrical panel — count empty slots, note the main breaker size
- Decide 115V or 230V — this shapes everything downstream
- Check the nameplate MCA and MOP — size the wire from those, not from the BTU
- Ask about GFCI — NEC 210.8(F) now applies, and you want an HF-rated device
- Get an insulation quote for the garage door before buying a bigger unit
- Call your building department about permits — ten minutes, worth it
- Confirm it’s a heat pump, not a cooling-only unit
- Check the minimum heating setpoint — if you want 45°F, most units cannot do it
- Check rated capacity at 5°F if you’re in a cold climate
- Look past the star rating — check how many reviews it’s based on
🔧 During and after install
- Mount the indoor unit high, clear of the garage door track
- Raise the outdoor unit 12–18 inches in snow country
- Slope the wall penetration downward toward the outside
- Fit a line-set cover to protect against UV
- Register the warranty within the required window
- Set a steady baseline temperature instead of switching on and off
- Mount the head around 8 ft, not at the ceiling — its thermostat reads its own return air
- Clean the filters monthly if you do woodwork
The bottom line
If you take one thing away, make it this: check your electrical panel and insulate your garage door before you spend a penny on equipment. Those two things determine which unit you can buy, how much the whole project costs, and whether you’re happy with the result.
For most people with a two-car garage, a 12,000 BTU heat pump on a 115V dedicated circuit is the practical sweet spot. It’s enough capacity for a reasonably sealed space, it avoids the cost and hassle of a 230V circuit, and DIY kits make the install genuinely achievable in a weekend.
Go bigger if your garage is bare, tall, or in a properly cold climate. Go smaller if it’s a single-car garage that’s already finished. And whatever you buy, give it its own circuit.
Comparing brands more broadly? Start with our best mini split heat pumps roundup. Curious about the DIY route specifically? We’ve covered the MRCOOL DIY system in depth. And if you’re weighing this against conditioning your whole house, our best heat pumps guide is the place to start.
Sources

Heat Pump Reviews Editorial Team
Our editors research heat pumps full time: manufacturer specifications, AHRI and ENERGY STAR listings, published cold-climate performance data, warranty terms, installer feedback and owner reviews. We do not accept payment for placement, and every rating follows our published methodology.